Secure Your Free In-Person Estimate
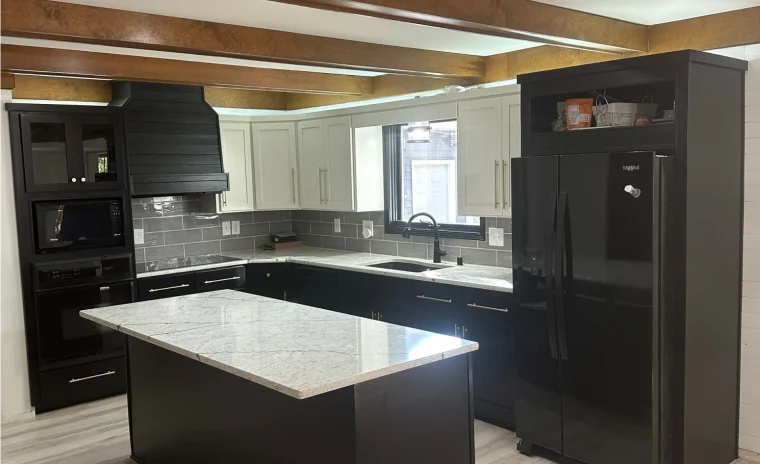
Avoid 5 Costly Cabinet Refacing Mistakes in Appleton, WI
Choosing Low-Quality Materials That Deteriorate Quickly
Homeowners often select materials based solely on upfront cost, overlooking durability and long-term performance. Thin veneers, low-grade laminates, and poorly manufactured door fronts may save money initially, but they fail under normal kitchen conditions within just a few years. In Appleton’s climate, where summer humidity can reach uncomfortable levels and winter heating systems dry indoor air significantly, cabinet materials expand and contract repeatedly. Low-quality veneers peel at the edges, laminates bubble near heat sources like ranges and dishwashers, and poorly bonded surfaces delaminate completely.
The solution begins with material selection that matches your kitchen’s specific conditions. Solid wood veneers with proper thickness (at least 1/32 inch) resist warping and provide lasting adhesion. Thermofoil options work well for homeowners seeking moisture resistance, particularly in homes where cooking generates substantial steam. High-pressure laminates offer durability for families with active kitchens. When evaluating kitchen cabinet options, request samples you can examine under strong lighting, checking for consistent color, uniform texture, and proper edge banding. Professional installation ensures materials bond correctly to existing cabinet boxes, with proper surface preparation and climate-appropriate adhesives that accommodate Wisconsin’s temperature fluctuations throughout the year.
Inadequate Surface Preparation Before Application
Surface preparation determines whether new veneers and laminates adhere permanently or fail within months. Many DIY attempts and rushed contractor work skip essential cleaning, degreasing, and sanding steps that create proper bonding surfaces. Cooking grease accumulates in microscopic layers on cabinet faces, even when surfaces appear clean. Old finishes may contain silicone or wax that prevents adhesives from forming molecular bonds with underlying wood. Without thorough preparation, new materials initially appear perfect but gradually separate as moisture, heat, and daily use stress the weak adhesive connection.
Proper preparation requires multiple sequential steps that cannot be abbreviated. First, heavy-duty degreasers remove all cooking residue, particularly around range cabinets where grease vaporizes during cooking and settles on surrounding surfaces. Second, careful sanding with appropriate-grit sandpaper creates a slightly rough texture that maximizes adhesive contact area without damaging the existing cabinet structure. Third, tack cloths remove all sanding dust that would otherwise compromise the bond. Finally, professional-grade primers seal porous surfaces and ensure uniform adhesion. This process takes significant time but prevents the most common cause of premature failure. When working with a cabinet refacing service, confirm their preparation protocol includes all these steps and allows adequate drying time between stages.
Mismatched Colors and Inconsistent Finishes
Achieving consistent color across all cabinet components presents a substantial challenge that homeowners frequently underestimate. Cabinet refacing involves multiple material types: existing box frames, new door fronts, drawer faces, and veneer on exposed sides. Each component may come from different manufacturing batches or material sources. Wood-tone finishes vary between veneer sheets due to natural grain variation. Even identical paint colors appear different when applied to dissimilar substrates. The result is a kitchen with subtly mismatched tones that create a patchwork appearance rather than a cohesive design.
Solving this issue requires careful material sourcing and finishing strategy from the project’s beginning. Order all materials simultaneously from a single supplier whenever possible to ensure batch consistency. For wood-tone finishes, select book-matched veneers where grain patterns flow naturally from one panel to the next. When painting, apply the same number of coats to all surfaces, using identical application methods and environmental conditions. Many homeowners in the Fox Valley area discover that lighting conditions in their kitchens change dramatically between morning and evening, making color matching even more critical. Professional finishers use color meters to verify consistency and adjust staining or painting techniques across different material types. Reviewing physical samples in your actual kitchen lighting before finalizing selections prevents costly mismatches.
Overlooking Hardware Compatibility and Placement
Hardware decisions directly impact both functionality and aesthetics, yet many refacing projects treat hardware as an afterthought. Existing hinge locations may not work with new door styles or thicknesses. Old handle holes rarely align with current design preferences or ergonomic standards. Homeowners often select visually appealing hardware without considering weight capacity, door swing clearance, or mounting requirements for their specific cabinet construction. When installation day arrives, contractors discover that chosen hardware cannot be properly installed, forcing expensive last-minute substitutions or structural modifications.
Preventing hardware problems starts with early planning that coordinates door design, material thickness, and hardware specifications. Measure existing hinge placements and hole patterns precisely. If changing from exposed to concealed hinges, verify that cabinet boxes have adequate thickness and structure to support the new mounting system. For handles and pulls, consider the door width and drawer height when determining placement; standard centering rules do not always produce the most functional or proportional results. Families with young children may prefer lower handle placement for accessibility. For bathroom cabinet refacing projects, moisture-resistant hardware finishes prevent corrosion in humid environments. Template guides ensure consistent hole placement across all doors and drawers. When exploring available cabinet designs, discuss hardware compatibility with your contractor before finalizing door styles.
Failing to Address Underlying Structural Issues
Cabinet refacing transforms the exterior appearance of existing cabinets, but it cannot repair fundamental structural problems. Homeowners sometimes proceed with refacing when their cabinet boxes have water damage, loose joints, sagging shelves, or compromised frames. Applying beautiful new surfaces to failing structures creates an attractive exterior that conceals ongoing deterioration. Within months, doors hang crooked as frames shift, drawers stick as boxes lose their square shape, and new veneers crack as underlying wood continues to degrade. The entire investment fails because the foundation could not support the improvement.
Thorough structural assessment before beginning any refacing work identifies problems that require repair or replacement. Remove doors and drawers to inspect cabinet boxes carefully. Look for water stains, soft spots, or discoloration that indicate moisture intrusion, particularly under sinks and around dishwashers. Check that all joints remain tight and boxes maintain square corners. Test shelf stability and adjustability mechanisms. In older Appleton homes built before modern moisture barriers became standard, basement-level or exterior-wall cabinets may have sustained hidden damage from condensation. Address any structural deficiencies before proceeding with cosmetic improvements. Sometimes, cabinet modification services can reinforce weakened areas, replace damaged components, or upgrade internal mechanisms while preserving serviceable box structures. This approach costs less than full replacement while ensuring your refacing investment rests on a solid foundation that will last for years.